How long to acclimatize before Kedarkantha summit – Checklist

How Long to Acclimatize Before Kedarkantha Summit: A Complete Guide

Why Proper Acclimatization Matters on Kedarkantha
Before attempting the Kedarkantha summit, trekkers must allow their bodies to adjust to the rapid rise from 6,400 ft at Sankri village to 12,500 ft at the peak. Proper acclimatization reduces the risk of altitude sickness and ensures a safer, more enjoyable experience in the Garhwal Himalayas. How to Prepare Your Body for a 12,000+ FT Winter Trek in the Himalayas outlines the key principles of preparation for high-altitude expeditions like Kedarkantha.The Challenge of High-Altitude Trekking in Uttarakhand
Trekking in Uttarakhand’s Garhwal Himalayas involves steep ascents, unpredictable winter weather, and thin air that can impair judgment. The trail climbs through pine forests and snow‑covered ridges, demanding careful pacing and repeated stops to let the body adapt.Consequences of Rushing the Acclimatization Process
Skipping adequate acclimatization before the Kedarkantha summit can trigger altitude sickness, manifesting as headaches, nausea, and severe breathlessness. In extreme cases, it may lead to life‑threatening conditions such as HAPE or HACE, which require immediate descent and medical attention.
Recommended Acclimatization Duration: Minimum 2-3 Days at Base Camp
Base Camp Details and Its Role in Acclimatization
The Kedarkantha base camp sits at approximately 11,200 ft, nestled in a sheltered meadow surrounded by pine and oak forests. Spending time here allows trekkers to begin the acclimatization duration process, letting the body adapt to reduced oxygen levels before the final ascent to the summit.
Why 2-3 Days Is the Minimum Recommendation
A minimum of 2-3 days at base camp provides enough exposure for physiological adjustments such as increased respiration and red‑cell production, which are critical for a safe summit push. This timeframe aligns with the Kedarkantha altitude profile, where the gain from base camp to the 12,500 ft summit is roughly 1,300 ft—a gradient that benefits from a short but deliberate acclimatization window.
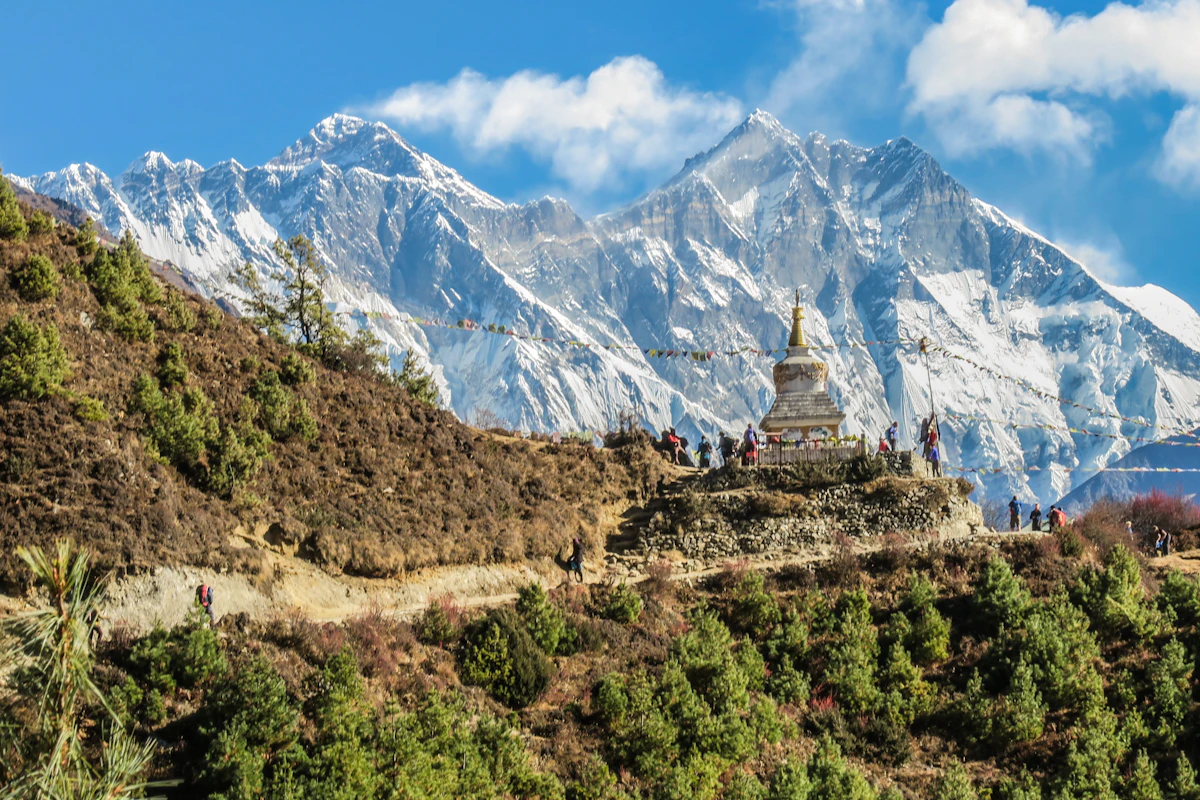
Day-by-Day Itinerary with Altitude Gain Per Day
Typical 5-Day Itinerary Breakdown
A well-paced day-by-day itinerary is essential for the Kedarkantha Winter Summit Trek. Managing daily altitude gain helps your body adjust and reduces the risk of altitude-related issues. Below is the standard five-day schedule used by Wild Ways.
| Day | Route | Altitude (ft) | Altitude Gain | Key Highlights |
|---|---|---|---|---|
| Day 1 | Dehradun → Sankri | ~6,400 ft (Sankri) | Drive from Dehradun (~2,100 ft) | Scenic Himalayan drive; overnight in Sankri; gentle acclimatization |
| Day 2 | Sankri → Judaism ka Talab Campsite | 9,100 ft | Approx. +2,700 ft | Pine forests, snow-covered meadows, lakeside campsite |
| Day 3 | Judaism ka Talab → Kedarkantha Base Camp | 11,200 ft | Approx. +2,100 ft | Alpine terrain, base camp settlement, early summit views |
| Day 4 | Base Camp → Kedarkantha Summit → Descend to Sankri | 12,500 ft (Summit) | Approx. +1,300 ft to summit | Pre-dawn summit push, 360-degree Himalayan views, long descent |
| Day 5 | Sankri → Dehradun | Return to ~2,100 ft | Descent and drive | Trek conclusion, drive back to Dehradun |
Day 1 serves as a light acclimatization day at Sankri before any significant trekking begins. From Day 2 onward, the trail climbs steadily through Kedarkantha’s winter landscape. The summit push on Day 4 starts early to maximize clear weather and safe descent conditions.
Alternative Itinerary Options: 4-Day vs 5-Day vs 6-Day Plans
Not every trekker has the same schedule or acclimatization needs. Choosing the right duration affects your daily altitude gain and overall safety on the Winter Summit Trek.
| Plan | Duration | Acclimatization Profile | Best Suited For |
|---|---|---|---|
| 4 Days | Condensed; steeper daily climbs, minimal buffer | Experienced high-altitude trekkers with limited time | |
| 5 Days | Balanced; gradual altitude gain with overnight stops | Most trekkers; recommended standard for Kedarkantha | |
| 6 Days | Slower pace; extra rest or buffer day for acclimatization | Beginners, seniors, or those prone to altitude sensitivity |
The 5-day plan remains the recommended choice for most adventurers. It spreads the altitude gain across manageable stages while keeping the summit window flexible. A 6-day plan adds a valuable safety margin, while a 4-day plan should only be attempted by those with prior high-altitude experience.

Kedarkantha Specific Altitude Profile
From Trailhead to Peak: The Vertical Journey
The Kedarkantha altitude profile follows a gradual ascent designed to match the body’s need for adaptation. Trekkers begin at the base camp around 6,000 ft, surrounded by dense Garhwal forests, before climbing steadily into higher alpine terrain.
The trail progresses through distinct elevation points. You pass Judaism ka Talab at 9,100 ft, continue to Kedarkantha base camp at 11,200 ft, and finish with the final push to the summit at 12,500 ft.
| Trek Stage | Altitude | Vertical Gain |
|---|---|---|
| Trailhead / Base Camp | ~6,000 ft | Starting point |
| Judaism ka Talab | 9,100 ft | ~3,100 ft |
| Kedarkantha Base Camp | 11,200 ft | ~2,100 ft |
| Summit | 12,500 ft | ~1,300 ft |
While the total climb is roughly 6,500 ft, the real vertical challenge lies in the thinning air above 10,000 ft. Each day’s gain is deliberate, giving trekkers time to breathe, hydrate, and acclimatize before the next push.
Respecting this profile is essential for a safe summit attempt. Moving too quickly from Kedarkantha base camp to the summit without adequate rest can increase the risk of altitude-related fatigue, even on an easy-moderate trek.
Altitude Sickness Symptoms and Early Warning Signs
Understanding Acute Mountain Sickness (AMS)
Acute Mountain Sickness (AMS) is the most common form of altitude sickness and can appear as early as 6–12 hours after reaching elevations above 2,500 m (≈8,200 ft). Typical symptoms include a throbbing headache, nausea or vomiting, fatigue, dizziness, and difficulty sleeping. Recognizing these signs early allows trekkers to rest, hydrate, and, if necessary, descend before the condition worsens.
High-Altitude Pulmonary Edema (HAPE)
HAPE involves fluid accumulation in the lungs and is a life‑threatening progression of altitude sickness. Early warning signs are persistent shortness of breath at rest, a dry cough that may advance to frothy or pink sputum, and a feeling of chest tightness. Individuals may also experience extreme fatigue and a rapid heartbeat. Immediate descent and medical attention are critical when HAPE is suspected.
High-Altitude Cerebral Edema (HACE)
HACE is the most severe form of altitude sickness, characterized by swelling of the brain. Symptoms evolve from those of AMS to include confusion, disorientation, difficulty walking (ataxia), and altered consciousness. In advanced stages, victims may exhibit vomiting, severe headache, and even loss of coordination. Prompt descent to lower altitude and emergency treatment are essential for survival.
Answering the common question “What are the symptoms of altitude sickness before Kedarkantha summit?”: the most frequent early indicators are headache, nausea, dizziness, shortness of breath, and confusion. Monitoring for these warning signs each day and communicating any discomfort to your guide can help prevent serious complications on the trek.

Prevention Strategies: Hydration, Ascent Rate, and Diamox Usage
Prevention strategies form the foundation of safe high-altitude trekking. Whether you're attempting the 12,500-foot summit of Kedarkantha or the 12,250-foot frozen vistas of Brahmatal, your body's ability to adapt depends heavily on how well you manage hydration, control your ascent rate, and utilize medications like Diamox when necessary. These three pillars—when applied correctly—significantly reduce the risk of acute mountain sickness (AMS) and support a successful summit push.
Hydration and Nutrition During the Trek
Moving through snow-draped trails like those on the Kedarkantha Winter Summit Trek demands constant vigilance over fluid intake. At altitude, your respiratory rate increases, leading to faster dehydration. The rule of thumb is to drink 3–4 liters of water per day, starting early in the morning before your body even signals thirst.
- Begin each day with at least one warm beverage—herbal tea or hot water with lemon—to kickstart circulation.
- Carry a hydration bladder or bottle that you can sip from regularly, aiming for small, frequent amounts rather than large gulps.
- Avoid alcohol and caffeine post-acclimatization days, as they increase urinary output and worsen dehydration.
Nutrition plays an equally vital role. High-carbohydrate meals help combat fatigue and maintain energy levels without overburdening digestion. On multi-day treks like Har Ki Dun, pack nutrient-dense snacks such as dried fruits, nuts, and energy bars to fuel your climbs steadily.
Safe Ascent Rate and Pacing
The cornerstone of preventing altitude illness lies in controlling how quickly you gain elevation. Medical experts recommend following the 300–500 ft per hour rule—limiting your net altitude gain to no more than 300–500 feet above your previous night's sleeping elevation within a 24-hour period. This gradual approach gives your body time to produce red blood cells and acclimatize effectively.
For Kedarkantha, a well-planned itinerary includes spending a night around 9,500–10,000 feet before pushing higher. This intermediate stop serves as the ideal altitude for a pre-summit acclimatization stop on Kedarkantha, allowing climbers to assess acclimatization symptoms while building stamina for the final push to 12,500 feet.
- Never skip rest steps during steep sections; short pauses every few minutes help regulate breathing and heart rate.
- Use the "climb high, sleep low" principle where feasible—ascending slightly during the day then descending to sleep at a lower altitude.
- Slow, steady pacing beats rushing any day. Even experienced mountaineers must respect the mountain’s rhythm.
Diamox (Acetazolamide): Dosage, Side Effects, and When to Start/Stop
Diamox, known by its generic name Acetazolamide, remains one of the most effective pharmacological tools for preventing AMS. It works by accelerating acclimatization through stimulating deeper breathing and improving oxygen saturation in the bloodstream.
The standard prophylactic dose ranges between 125mg to 250mg twice daily, typically taken once in the morning after breakfast and again in the evening before dinner. To maximize effectiveness, begin taking it 1–2 days before ascending above 8,000 feet and continue throughout the high-altitude portion of the trek until descent begins.
While generally safe, Side Effects of Diamox can include tingling in extremities, increased urination, mild headache, nausea, and altered taste sensation (especially carbonated drinks tasting flat). Serious allergic reactions are rare but require immediate medical attention.
| Timing | Recommended Action | Purpose |
|---|---|---|
| 1–2 Days Before Ascent | Start with half or full dose depending on sensitivity | Kickstart physiological adaptation |
| During High Altitude Stay | Continue twice-daily dosing | Mitigation and ongoing protection |
| After Summit Descent Begins | Discontinue unless advised otherwise | Avoid unnecessary prolonged use |
Important note: Diamox does not substitute for proper acclimatization practices. Always combine medication with cautious ascent planning, adequate hydration, and close self-monitoring for early signs of AMS.
Comparison of Itineraries: 4-Day vs 5-Day vs 6-Day Plans
Selecting the right duration for your Kedarkantha trek directly influences how well your body adjusts to thinning air, your energy levels on summit day, and your overall safety in the high Himalayas. The length of your itinerary determines the pace of your ascent and the quality of your acclimatization.
4-Day Itinerary: Speed and Risk Trade-off
A four-day schedule compresses the trek into a tight window, requiring longer walking hours and faster altitude gains. This approach leaves minimal time for natural acclimatization, which can increase the likelihood of altitude-related symptoms such as headache or fatigue. It is best reserved for trekkers who are already well-conditioned and have prior experience at elevation.
5-Day Itinerary: Balanced Approach
The five-day plan is the standard for Kedarkantha, offering a measured pace that respects the mountain's demands. It allows for a gradual climb through snow-draped pine forests, giving trekkers time to rest and hydrate at intermediate campsites. This duration provides a reliable balance between adventure and physiological adjustment.
6-Day Itinerary: Extended Acclimatization
Adding a sixth day creates a valuable buffer that can be used for rest, a slower ascent, or unexpected weather delays. This extended timeline significantly improves acclimatization quality, especially for those new to high-altitude environments. The slower rhythm also reduces physical strain, making the summit push feel more achievable.
| Duration | Acclimatization Quality | Physical Readiness | Risk Level | Best Suited For |
|---|---|---|---|---|
| 4-day | Limited; rapid elevation gain | High cardiovascular demand | Higher | Experienced trekkers with strict time constraints |
| 5-day | Moderate; steady progression | Manageable for most fit beginners | Balanced | Most trekkers aiming for the Kedarkantha summit |
| 6-day | Extended; includes rest or buffer day | Gradual conditioning | Lowest | First-time high-altitude trekkers |
The 5-day plan remains the recommended choice for most adventurers. It spreads the altitude gain across manageable stages while keeping the summit window flexible. A 6-day plan adds a valuable safety margin, while a 4-day plan should only be attempted by those with prior high-altitude experience.
Recommendations Based on Traveler Profile
Your choice of itinerary should match your fitness level, prior trekking experience, and the time you can dedicate to the mountains.
- Time-crunched, experienced trekkers: A 4-day itinerary comparison shows that speed is possible, but only if you are confident in your altitude tolerance.
- First-time Himalayan trekkers: The 5-day plan offers the safest introduction to Kedarkantha without unnecessary rush.
- Trekkers sensitive to altitude or cold: Opt for the 6-day plan to maximize acclimatization and reduce summit-day fatigue.
Pre-Trek Fitness Preparation Timeline
Cardio Training for High-Altitude Endurance
For pre‑trek fitness preparation, build a weekly cardio routine that mimics the trek’s demands. Start with 30‑45 minutes of hiking or stair climbing three times a week, gradually adding elevation or steep inclines as your legs adapt.
- Month 1‑2: 3 sessions/week of brisk walks or light jogs (30 min). Include 2 sessions of stair repeats (10‑12 flights) on a staircase.
- Month 3‑4: Increase to 4 sessions/week: 2 long hikes (45‑60 min) + 2 runs or stair intervals (20 min each).
- Month 5 (expedition month): Taper to 2‑3 sessions, focusing on simulated trek paces and short “altitude” walks with a weighted pack.
Strength and Balance Exercises
Robust strength training protects your knees and ankles on Kedarkantha’s snowy ridges. Prioritize legs, core, and balance movements three times weekly.
- Leg power: Squats, lunges, and step‑ups (3 sets of 12‑15 reps) using a light pack for added resistance.
- Core stability: Planks, dead bugs, and mountain‑dog poses (30‑45 seconds hold) to support posture on uneven terrain.
- Balance drills: Single‑leg stands, BOSU or foam‑pad exercises, and tree‑pose variations (1‑2 minutes each side).
Begin this program 8‑10 weeks before departure, then reduce volume while maintaining intensity during the final two weeks.
Breathing and Lung Capacity Workouts
Effective breathing exercises are a cornerstone of pre‑trek acclimatization, preparing your lungs for thin alpine air. Incorporate daily diaphragmatic and paced breathing drills.
- Diaphragmatic breathing: 5‑minute sessions, 3 times daily – lie prone, place a hand on the abdomen, and breathe deeply to expand the belly.
- Box breathing: Inhale for 4 counts, hold 4, exhale 4, hold 4; repeat 8‑10 cycles before sleep.
- Altitude simulation: Use a small breathing resistance mask (if available) for 10‑minute intervals, 2 times a week, to increase ventilatory efficiency.
Maintain this routine throughout your fitness preparation phase, intensifying it in the final month to sharpen oxygen utilization before the Kedarkantha summit push.
Diamox Dosage, Side Effects, and When to Start/Stop
Diamox Dosage Guidelines for Kedarkantha
Acetazolamide, commonly known by its brand name Diamox, is a prophylactic medication used to help the body adjust to high altitudes. For the Kedarkantha Winter Summit Trek, which peaks at an elevation of 12,500 feet, understanding the correct dosage is essential for a safe and successful climb. The standard preventative dose for healthy adults is typically 125 mg to 250 mg, administered twice daily (usually 12 hours apart).
To maximize its effectiveness, you should begin taking Diamox at least one to two days before starting your ascent into higher elevations. The medication should be continued through the summit phase and stopped once you begin your descent to lower altitudes. It is critical to note that Diamox is a preventative tool, not a magic pill; it does not replace proper acclimatization. You cannot skip scheduled rest days or rapid ascent protocols simply by taking this drug, as it only reduces the physiological risk, not the actual physiological adaptation required.
Common Side Effects and Safety Considerations
While highly effective, Acetazolamide can cause side effects as it alters the body's acid-base balance to stimulate faster breathing. Trekkers should be aware of common reactions, which typically include:
- Tingling, numbness, or pins-and-needles sensation in the fingers, toes, and limbs.
- Frequent urination (increased diuresis) and mild dehydration risk.
- Mild gastrointestinal upset, nausea, or loss of appetite.
- Subtle changes in taste, such as carbonated beverages tasting flat.
These side effects are generally mild and often subside as the body adjusts, but they serve as important indicators of how the drug is working. If you experience severe symptoms, such as a skin rash, extreme fatigue, or difficulty breathing, discontinue use and consult a trek leader or medical professional immediately. Always consult your physician before starting Diamox, especially if you have a sulfa allergy, kidney disease, or electrolyte imbalances, to ensure safe start/stop protocols are tailored to your health profile.
Emergency Descent Protocols and Nearest Medical Facilities
Navigating the high-altitude terrains of the Garhwal Himalayas on the Kedarkantha winter trek requires a disciplined approach to safety. While the summit of 12,500 feet offers breathtaking 360-degree views, the thin air poses real physiological risks. Understanding the exact steps to take when altitude illness strikes can be the difference between a successful summit and a life-threatening crisis.
Immediate Response to Altitude Illness
When symptoms of Acute Mountain Sickness (AMS)—such as persistent headache, nausea, fatigue, or breathlessness—manifest during the climb, the absolute priority is to halt all upward progress. Pushing through early signs of altitude illness is highly dangerous and can rapidly escalate to severe high-altitude pulmonary or cerebral edema.
The only definitive treatment for altitude sickness is to go down. An immediate emergency descent to a lower elevation must be initiated without delay. The immediate response protocol includes the following steps:
- Stop ascending immediately: Rest in a sheltered, low-exertion spot.
- Hydrate and monitor: Drink warm fluids and monitor vital signs closely.
- Initiate descent: If symptoms do not improve within 30 to 60 minutes of resting, descend at least 500 to 1,000 meters, or to the nearest safe camp, accompanied by a guide.
- Never leave the affected climber unattended: High-altitude environments demand constant buddy checks and mutual support.
Nearest Medical Support Along the Route
The remote snow-covered ridges of the Kedarkantha route mean that advanced medical facilities are not physically accessible on the mountain slopes. Trekkers rely on a robust field rescue framework designed to bridge the gap between wilderness first aid and professional clinical care.
The nearest basic medical aid posts are located in the trailhead village of Sankri, which serves as the gateway to the trek. For severe trauma or severe altitude sickness requiring advanced clinical intervention, the nearest major hospitals are located in the district headquarters of Uttarkashi and the major medical hub of Dehradun.
To manage the gap in remote mountain terrain, our team utilizes advanced telemedicine links to connect our expedition leaders directly with high-altitude medical specialists. This allows us to assess severe cases in real-time and coordinate the most efficient evacuation plan. In critical situations where road access is blocked by heavy winter snow, we initiate helicopter evacuation protocols to airlift the patient directly to the nearest equipped medical facility.